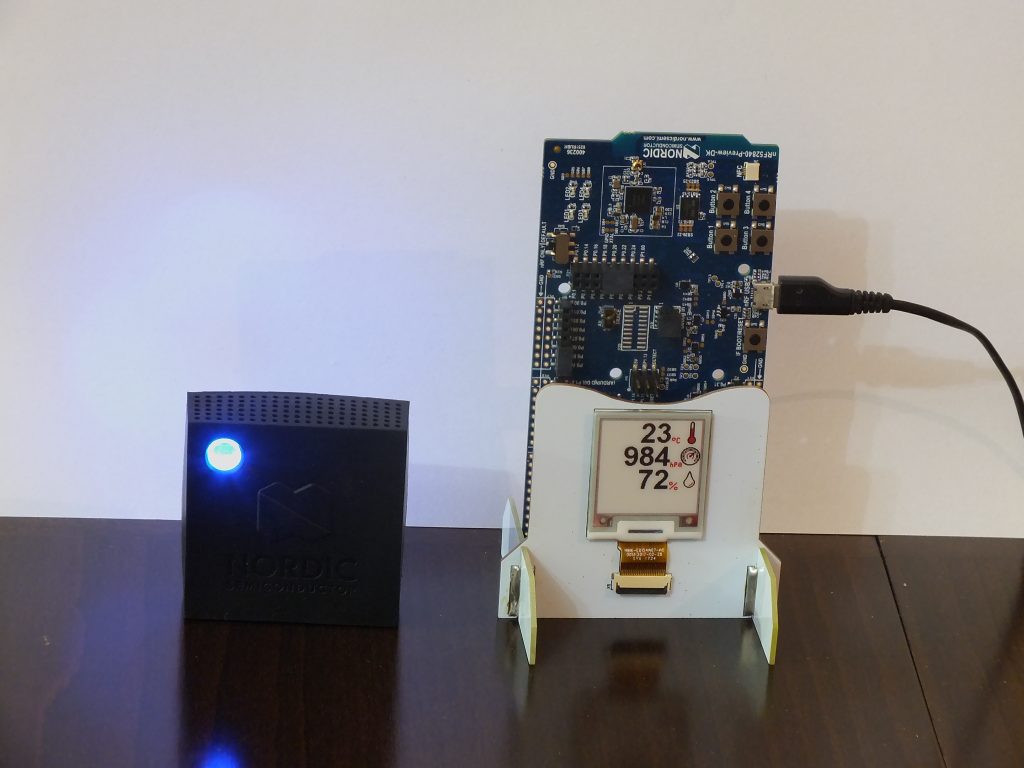
Nordic Thingy:52 + nRF52840-Preview-DK + E-PAPER = Weather Station

How to make it work:
To make it work you should have:
- E-Paper PCB (manufactured from WeatherStation_Gerber.zip file)
- sensor board: Nordic Thingy:52
- main board: nRF52840-Preview-DK (or just DK when it’s available)
- all elements form WS_BOM.pdf
- Keil uVision5 (can be MDK-Lite edition, the 32kb limit is enough to run that project)
- schematic (not necessary but usefull) from WeatherStation_Schematic.PDF
- S140 SoftDevice (please use the 5.0.0.2 version of S140 SoftDevice)
- Tool for uploading SoftDevice: nRFgo Studio
- Smartphone with Bluetooth LE
- Nordic Thingy Application (installed on smartphone)
- and of course Source Code (WS_PRG.zip)
2017-11-12 – Description update
The current source code and hex files are not working with newer S140 versions. Please use 5.0.0.2 version of S140 SoftDevice. Thanks to ToasTer86 for finding that out.
2017-11-04 – Source Code updated (link is the same: WS_PRG.zip)
- negative temperatures corrected
- temperature displayed with one decimal place
Unfortunately the negative temperatures are always shown with 0 at decimal place (that’s because Thingy:52 sends negative temperatures that way)
Steps:
- Solder all BOM elements on E-Paper PCB
- Solder two holders to E-Paper PCB
- Stick somehow the E-Paper to that PCB (I used double sided adhesive tape)
- Set the name of your Thingy:52 to “Thingy” (using Nordic Thingy Application)
- Set the “Advertisement timeout” of your Thingy:52 to 180 s (using Nordic Thingy App)
- Set “nRF Power Source” switch (on nRF52840-Preview-DK) to VDD
- Set “VEXT->nRF” switch (on nRF52840-Preview-DK) to OFF
- Set “TRACE” switch (on nRF52840-Preview-DK) to OFF
- Set “nRF ONLY | DEFAULT” switch (on nRF52840-Preview-DK) to DEFAULT
- Upload the S140 SoftDevice to nRF52840-Preview-DK (using nRFgo application)
- Open, compile and upload WS_PRG to nRF52840-Preview-DK (using Keil uVision)
- Connect the E-Paper PCB to arduino connector of nRF5284-Preview-DK
- Connect the power source to nRF5284-Preview-DK by “nRF USB” connector
- Turn on the Thingy:52
After finishing all steps, the weather station should start working. The main board is connecting by Bluetooth to Thingy:52 board every two and half minutes to get sensor data (that’s why we set Advertisement timeout of Thingy:52 to 180 s, to make it not go to sleep between measurements).
After getting the weather data, the E-Paper displays the measurements.
If you have any problem with running that project or found any error, feel free to e-mail me or just write a comment.
The project of E-Paper PCB is available at circuitmaker.com.
Here you have some video form working weather station:
